Tuesday, December 24, 2013
Google's AdMob Refunded Several Payments
Over the past few days we have had some weird experiences with Google's AdMob. They refunded several hundred dollars worth of payments that we made for marketing campaigns; and then today they reversed some of those same payments. The only thing I could find online about this issue was in a forum:
http://forums.makingmoneywithandroid.com/advertising-networks/4032-admob-refunded-all-my-payments.html
Has anyone else had this same issue? I can't find any contact information for them either. Sounds like a major screw up to me :-(
Monday, December 2, 2013
Sivart Technology's Word Crank is Approved for Google Play for Education
We were recently notified by Google, that our word game, Word Crank, has successfully passed review and is approved for inclusion in Google Play for Education!
What is Google Play for Education? "Google Play for Education is a destination where schools can find great, teacher-approved, educational apps and videos on Play Store. Teachers can filter content by subject matter, grade and other criteria." -- Google
We are so excited to have this opportunity and look forward to seeing what results!
Wednesday, July 31, 2013
Google Play Games App Overview
Last Wednesday, Google released the Google Play Games App. According to Google: "[it's] is the easiest way for you to discover new games, track achievements and scores, and play with friends around the world."
What I really enjoy about the app is the ability to easily see all of the games that I currently have installed that include the Game Play Services. Previously you basically had to just look at the developer's release notes to find out if they had incorporated Game Services.
Furthermore, the release of this app is definitely an opportunity for developers who may have been sitting on the fence on whether they should give the Game Services a try. You essentially get free exposure for your game by integrating with Google's service. This could also really drive engagement, as each game the user plays is displayed prominently with a badge showing the current number of achievements they have won.
The interface is very simple and clean. You have several pathways to discovering new games and new people for your Google+ circles. Have you downloaded the new Google Play Games app yet? What are your first impressions? Leave comments below.
Wednesday, June 19, 2013
[Android Tips]: Play Store 'staged rollouts' with Google Analytics
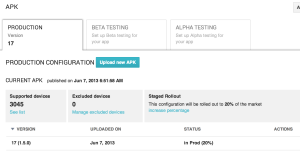
Recently the Google Play Store has added the ability for developers to release a new version of their application's apk progressively by means of staged rollouts. According to Google this allows you to "get feedback on your new app or app update early in its development and make sure your users are happy with the results." With the release of the latest version of Word Crank, our flagship game, we decided to take advantage of this new feature.
We released version 1.5.0 of our application to 20% of users initially and then monitored the results in Google Analytics. In order to distinguish the engagement of the users on the latest version of the app from the others, we created two new custom segments in our primary Dashboard view. The first segment included all users with version 1.5.0 of the application and the other segment included all other versions of the application.
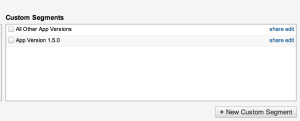
Once these segments were created we monitored the statistics for a few days and then gradually increased the percentage of rollout to 100%. This is an extremely useful tool in making sure your new release increases user engagement and the desired traffic goals of your application.
Have you tried staged rollouts? Leave a comment below.
We released version 1.5.0 of our application to 20% of users initially and then monitored the results in Google Analytics. In order to distinguish the engagement of the users on the latest version of the app from the others, we created two new custom segments in our primary Dashboard view. The first segment included all users with version 1.5.0 of the application and the other segment included all other versions of the application.

Once these segments were created we monitored the statistics for a few days and then gradually increased the percentage of rollout to 100%. This is an extremely useful tool in making sure your new release increases user engagement and the desired traffic goals of your application.
Have you tried staged rollouts? Leave a comment below.
Monday, June 10, 2013
[Android Tips]: Getting users to +1 your app
In order to improve your application's ranking in the Google Play store, you should get users to +1 your app. You can do this using GooglePlayServices and the PlusOneButton Android UI element. Here is a simple layout file that includes the plus one button:
[code]
<?xml version="1.0" encoding="utf-8"?>
<LinearLayout xmlns:android="http://schemas.android.com/apk/res/android"
android:layout_width="match_parent"
android:layout_height="wrap_content"
android:orientation="horizontal"
android:padding="10dip"
android:background="@android:color/black" >
<com.google.android.gms.plus.PlusOneButton
xmlns:plus="http://schemas.android.com/apk/lib/com.google.android.gms.plus"
android:id="@+id/plus_one_button"
android:layout_width="wrap_content"
android:layout_height="wrap_content"
plus:size="tall"
plus:annotation="inline" />
</LinearLayout>
[/code]
It creates the following User Interface Component:

Then in your MainActivity's onResume method you can check to see if the layout is visible and then initialize the button:
[code]
@Override
protected void onResume() {
super.onResume();
if (plusLayout.getVisibility() == View.VISIBLE) {
// Refresh the state of the +1 button each time the activity receives focus.
mPlusOneButton.initialize(mPlusClient, APP_URL, PLUS_ONE_REQUEST_CODE);
}
}
[/code]
The APP_URL is the link to your app on the Google Play Store
The PLUS_ONE_REQUEST_CODE is any integer value >= 0
Building on the AppRater code base, you can modify it to set a flag when you want to show the plus_button_layout to the user, similar to the following:
[code]
public class AppRater {
private final static int DAYS_UNTIL_PROMPT = 1;
private final static int LAUNCHES_UNTIL_PROMPT = 4;
public static void app_launched(Context mContext) {
SharedPreferences prefs = mContext.getSharedPreferences(PreferenceConstants.PREFERENCE_NAME, Activity.MODE_PRIVATE);
if (prefs.getBoolean(PreferenceConstants.PREFERENCE_SHOW_PLUS, false)) { return ; }
SharedPreferences.Editor editor = prefs.edit();
// Increment launch counter
long launch_count = prefs.getLong("launch_count", 0) + 1;
editor.putLong("launch_count", launch_count);
// Get date of first launch
Long date_firstLaunch = prefs.getLong("date_firstlaunch", 0);
if (date_firstLaunch == 0) {
date_firstLaunch = System.currentTimeMillis();
editor.putLong("date_firstlaunch", date_firstLaunch);
}
// Wait at least n days before opening
if (launch_count >= LAUNCHES_UNTIL_PROMPT) {
if (System.currentTimeMillis() >= date_firstLaunch +
(DAYS_UNTIL_PROMPT * 24 * 60 * 60 * 1000)) {
editor.putBoolean(PreferenceConstants.PREFERENCE_SHOW_PLUS, true);
editor.commit();
return ;
}
}
editor.commit();
}
}
[/code]
*** Download our first game: Word Crank today for free: Available on iOS and Android***
[code]
<?xml version="1.0" encoding="utf-8"?>
<LinearLayout xmlns:android="http://schemas.android.com/apk/res/android"
android:layout_width="match_parent"
android:layout_height="wrap_content"
android:orientation="horizontal"
android:padding="10dip"
android:background="@android:color/black" >
<com.google.android.gms.plus.PlusOneButton
xmlns:plus="http://schemas.android.com/apk/lib/com.google.android.gms.plus"
android:id="@+id/plus_one_button"
android:layout_width="wrap_content"
android:layout_height="wrap_content"
plus:size="tall"
plus:annotation="inline" />
</LinearLayout>
[/code]
It creates the following User Interface Component:
Then in your MainActivity's onResume method you can check to see if the layout is visible and then initialize the button:
[code]
@Override
protected void onResume() {
super.onResume();
if (plusLayout.getVisibility() == View.VISIBLE) {
// Refresh the state of the +1 button each time the activity receives focus.
mPlusOneButton.initialize(mPlusClient, APP_URL, PLUS_ONE_REQUEST_CODE);
}
}
[/code]
The APP_URL is the link to your app on the Google Play Store
The PLUS_ONE_REQUEST_CODE is any integer value >= 0
Building on the AppRater code base, you can modify it to set a flag when you want to show the plus_button_layout to the user, similar to the following:
[code]
public class AppRater {
private final static int DAYS_UNTIL_PROMPT = 1;
private final static int LAUNCHES_UNTIL_PROMPT = 4;
public static void app_launched(Context mContext) {
SharedPreferences prefs = mContext.getSharedPreferences(PreferenceConstants.PREFERENCE_NAME, Activity.MODE_PRIVATE);
if (prefs.getBoolean(PreferenceConstants.PREFERENCE_SHOW_PLUS, false)) { return ; }
SharedPreferences.Editor editor = prefs.edit();
// Increment launch counter
long launch_count = prefs.getLong("launch_count", 0) + 1;
editor.putLong("launch_count", launch_count);
// Get date of first launch
Long date_firstLaunch = prefs.getLong("date_firstlaunch", 0);
if (date_firstLaunch == 0) {
date_firstLaunch = System.currentTimeMillis();
editor.putLong("date_firstlaunch", date_firstLaunch);
}
// Wait at least n days before opening
if (launch_count >= LAUNCHES_UNTIL_PROMPT) {
if (System.currentTimeMillis() >= date_firstLaunch +
(DAYS_UNTIL_PROMPT * 24 * 60 * 60 * 1000)) {
editor.putBoolean(PreferenceConstants.PREFERENCE_SHOW_PLUS, true);
editor.commit();
return ;
}
}
editor.commit();
}
}
[/code]
*** Download our first game: Word Crank today for free: Available on iOS and Android***
Saturday, May 4, 2013
[Android Tips]: Uploading Images to a Remote Web Service

In order to upload images to a web service that requires a Multipart request, the below code will create the file part object and include it as part of the MultiPartRequest entity. I store this method in a separate class and call it statically from within an AsyncTask. This type of functionality is particularly useful for when you want to upload a user's profile photo and store it on your remote file system.
The following Apache libraries are required:
- commons-codec.jar (version used: 1.3)
- commons-httpclient.jar (version used: 3.0-rc4)
- commons-logging.jar
[code language="java"]
import org.apache.commons.httpclient.HttpClient;
import org.apache.commons.httpclient.methods.PostMethod;
import org.apache.commons.httpclient.methods.multipart.ByteArrayPartSource;
import org.apache.commons.httpclient.methods.multipart.FilePart;
import org.apache.commons.httpclient.methods.multipart.MultipartRequestEntity;
import org.apache.commons.httpclient.methods.multipart.Part;
static boolean doImageUpload(final byte[] imageData, String fileName) throws Exception {
String responseString = null;
PostMethod method = new PostMethod(<remote url>);
HttpClient client = new HttpClient();
client.getHttpConnectionManager().getParams().setConnectionTimeout(100000);
FilePart photo = new FilePart("file-data", new ByteArrayPartSource(fileName, imageData));
photo.setContentType("image/jpeg");
photo.setCharSet(null);
Part[] parts = {photo};
method.setRequestEntity(new MultipartRequestEntity(parts, method.getParams()));
client.executeMethod(method);
responseString = method.getResponseBodyAsString();
method.releaseConnection();
if (responseString.equals(<successful response>)) {
return true;
} else {
return false;
}
}
[/code]
Have you done this a different way? Leave a comment below.
*** Download our first game: Word Crank today for free: Available on iOS and Android***
Friday, April 26, 2013
The Social Media Stats
Very surprising information about which social media sites appeal to the various demographics.
Monday, March 18, 2013
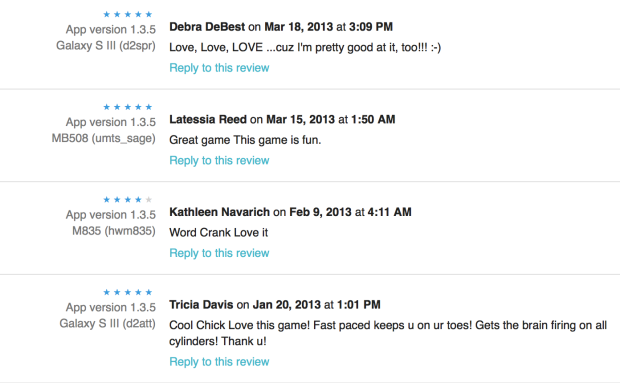
Seems People Like Word Crank
Sunday, March 10, 2013
Tuesday, January 15, 2013
Creating An Elastic Beanstalk Application with AWS
In experimenting with new technologies and a possible server infrastructure for some of our future products, I came across the Elastic Beanstalk offering of Amazon AWS. Essentially, Elastic Beanstalk takes the guess work out of setting up a Cloud-based application environment. According to Amazon,
Elastic Beanstalk supports applications developed in Java, PHP, .NET, Python, and Ruby. To that end, I wanted to share through a series of screen shots how simple it is to get an application up and running.
Once you choose the type of application server that you want to use, in this case I chose Tomcat 7, you are presented with the following screen:

It takes a few minutes for your application stack to be created. I would recommend updating the notification settings to your personal email address. If your application server becomes unhealthy or there are upcoming events that may affect your RDS instance, etc, you will be notified via email. Next you just click on "Upload New Version" and fill out some very basic information, choose your war file and Amazon does the rest.
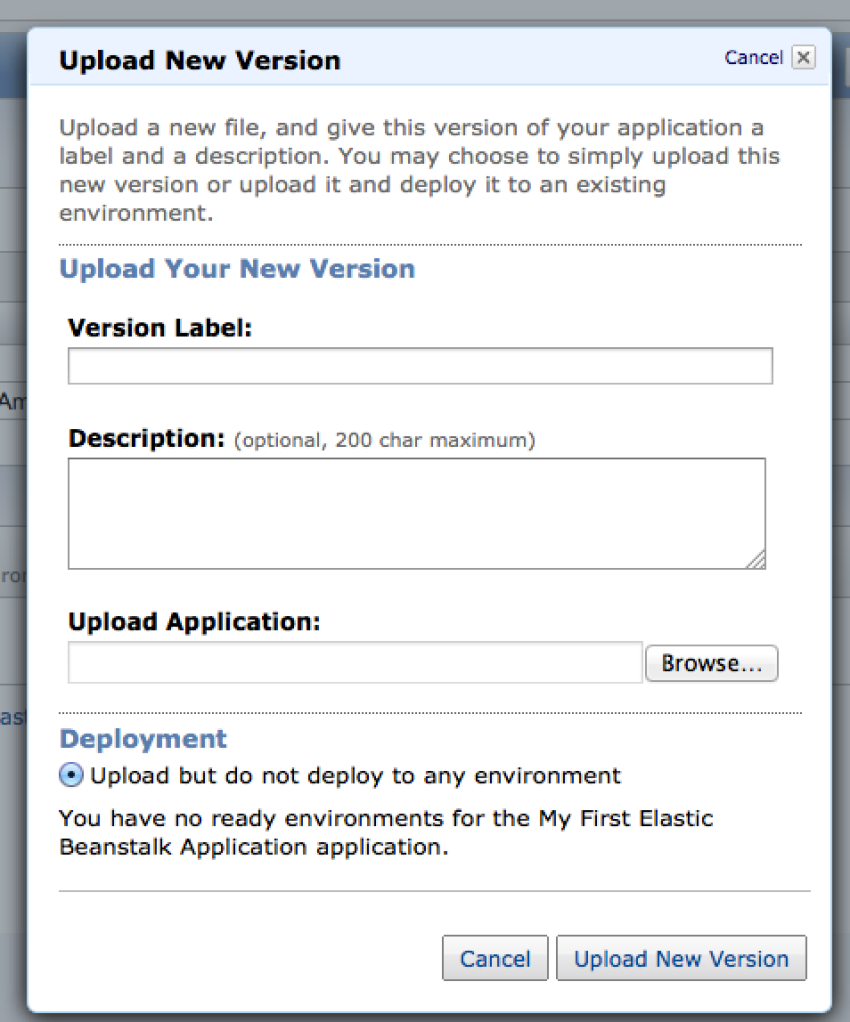
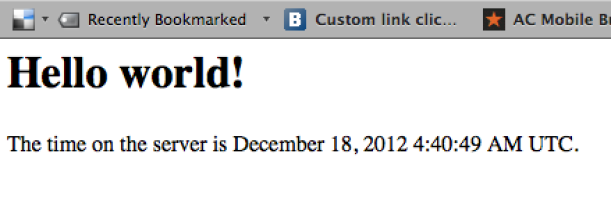
Within a few minutes you have your very own application deployed in the "Cloud"! For testing purposes I created a simple Hello World application using Spring MVC.
Have you tried Elastic Beanstalk? Did it work for your needs? Leave comments below.
"You simply upload your application, and AWS Elastic Beanstalk automatically handles the details of capacity provisioning, load balancing, scaling, and application health monitoring."
Elastic Beanstalk supports applications developed in Java, PHP, .NET, Python, and Ruby. To that end, I wanted to share through a series of screen shots how simple it is to get an application up and running.
Once you choose the type of application server that you want to use, in this case I chose Tomcat 7, you are presented with the following screen:

It takes a few minutes for your application stack to be created. I would recommend updating the notification settings to your personal email address. If your application server becomes unhealthy or there are upcoming events that may affect your RDS instance, etc, you will be notified via email. Next you just click on "Upload New Version" and fill out some very basic information, choose your war file and Amazon does the rest.

Within a few minutes you have your very own application deployed in the "Cloud"! For testing purposes I created a simple Hello World application using Spring MVC.

Have you tried Elastic Beanstalk? Did it work for your needs? Leave comments below.
Wednesday, January 2, 2013
2012 Blog in Review
The WordPress.com stats helper monkeys prepared a 2012 annual report for this blog.

Here's an excerpt:
Click here to see the complete report.

Here's an excerpt:
600 people reached the top of Mt. Everest in 2012. This blog got about 2,900 views in 2012. If every person who reached the top of Mt. Everest viewed this blog, it would have taken 5 years to get that many views.
Click here to see the complete report.
Subscribe to:
Posts (Atom)

